GIMP Coverage Tutorial
How to calculate skin coverage percentage in GIMP.
For Flight Rising users who wish to create their own Custom Skins for their dragons, there are two types of Blueprints that can be used to submit to the Skins Queue. The Accent Blueprints are for any design that covers 30% or under of the original dragon illustration’s surface. The Skins Blueprints are for any design that covers over 30%. The tutorials below can be used to calculate your design’s coverage percentage so you know whether to submit a design using a Skin or Accent Blueprint.
You will need a version of GIMP (GNU Image Manipulation Program) to use this tutorial.
Step 1: Open Your File
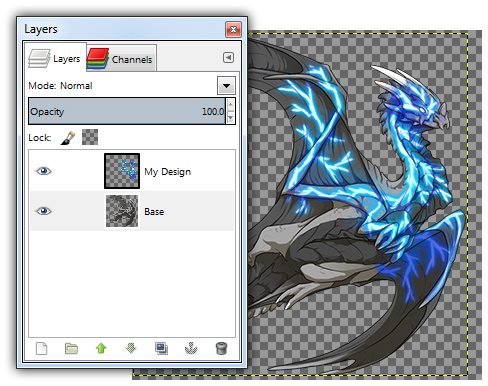
If you have not done so already, you will need to resize your image. Under the Image menu, navigate to Image--> Scale Image and the following dialogue box will open.
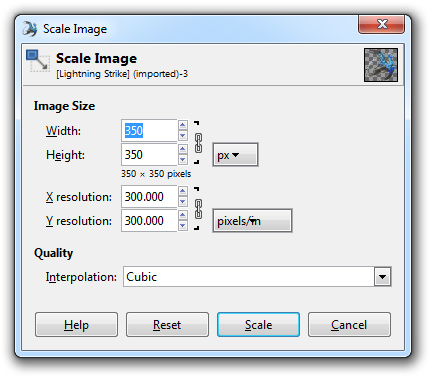
Change the image height and width to 350 x 350 pixels and hit “OK.”
Step 2: Create an Alpha Channel Layer
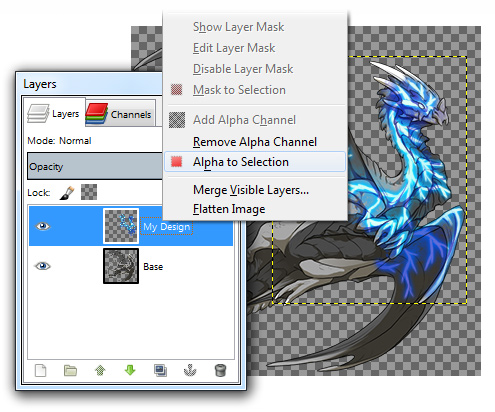
Right Click on your accent layer in the Layers palette. Click on Alpha to Selection. This will select all the pixels of your design, including your partially transparent pixels.
Go to your Channels Palette. If you can not find your Channels palette, go to the Windows menu, navigate to Windows--> Dockable Dialogs/Channels to make it appear or disappear. At the bottom of the Channels palette is an empty area for custom alpha channels. Right click in this area and select New Channel.
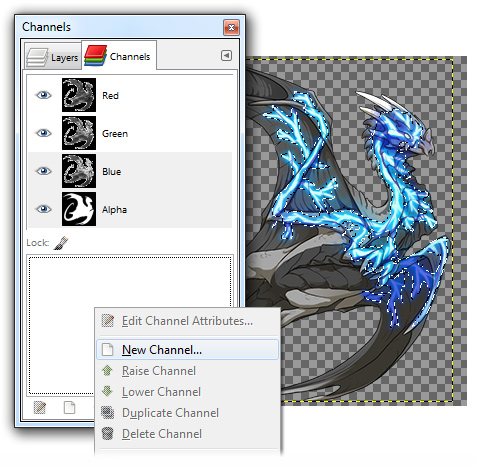
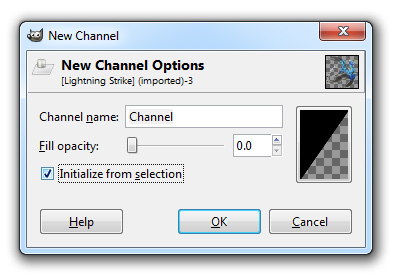
A New Channel Options window will open. Turn the Fill opacity down to 0, and check the Initialize from selection box.
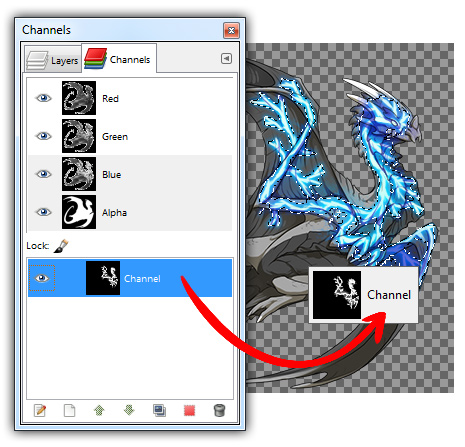
Hit OK. This will cause a new Channel Selection to appears in your Channels palette. Now click on the new channel and drag its thumbnail from the Channels palette onto the image canvas.
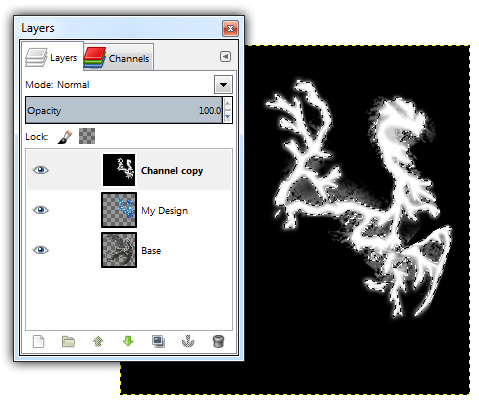
This will create a new black and white layer out of the canvas where your design appears as white and gray on a black background.
Step 3: Calculate Your Coverage
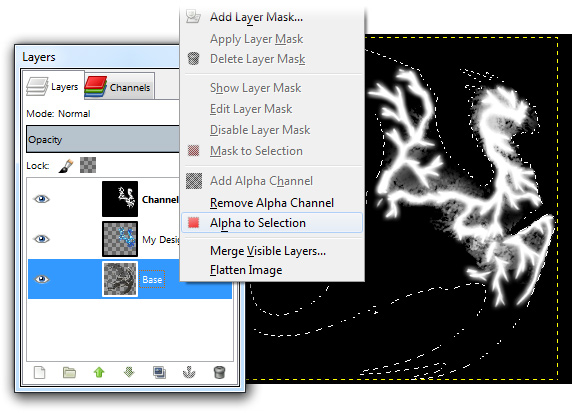
Open your Histogram palette. If you can not find your Histogram palette, go to the Windows menu, navigate to Windows--> Dockable Dialogs/Histogram to make it appear or disappear. In the Layers palette, make sure the newly created layer, Channel copy, is selected.
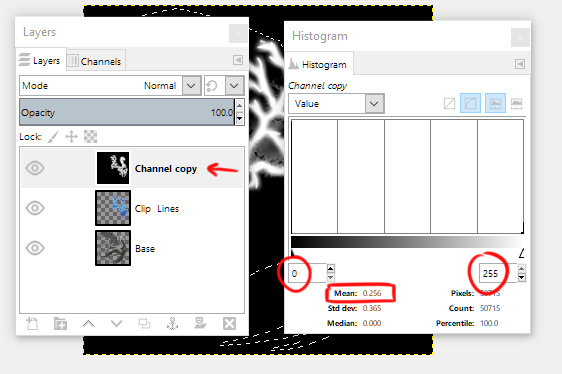
In the Histogram palette, make sure the darkest value is set to Zero, and the lightest value is set to 255. Now check the Mean: number. For this example design, 0.256 is the Mean. Multiply this number by 100 and you will have the skin coverage: (0.256x100)=25.6%. So this design covers 25% of the dragon (note that we do not round up the decimals when calculating skin coverage, so a skin that is 30.9% coverage is still considered 30%).

